Introduction
This pig in a blanket amigurumi pattern creates an adorable crochet toy that perfectly combines cuteness and coziness! Standing at just 5 inches tall, this intermediate-level amigurumi project features a sweet pink pig wrapped in a customizable blanket.
Perfect for your desk, as a gift, or as a child's toy, this pig amigurumi is sure to make everyone smile. The pattern uses simple crochet techniques to create a charming character with personality.
Kids will especially love having their own pig in a blanket with the blanket made in their favorite color!
Materials and Supplies
Yarn Requirements:
- 4/Medium Weight Yarn in:
- Very light pink for hooves
- Regular pink for body and arms
- Hot pink for snout
- Purple for the blanket (or your preferred color)
Tools Needed:
- 4mm Crochet Hook (3mm optional for blanket)
- 10mm safety eyes
- Tapestry needle for weaving in ends
- Hot glue (optional)
- Scissors
- Stuffing
Project Details
- Difficulty Level: Intermediate
- Finished Size: Approximately 5" tall
- Crochet Techniques Used: Magic ring, single crochet, half double crochet, double crochet, triple crochet, front loop only, back loop only
- Time to Complete: 4-6 hours
Amigurumi Pig Pattern Instructions
Head and Body
We start by making the head and working down to make the body. The head and body are worked in one continuous piece.
Round 1: 6 Sc into a Magic Ring (6)
Round 2: Inc all around (12)
Round 3: Inc, Sc in the next st all around (18)
Round 4: Sc all around (18)
Round 5: Inc, Sc in the next 2 st all around (24)
Round 6: Sc all around (24)
Round 7: Inc, Sc in the next 3 st all around (30)
Now we will mark where to place the safety eyes. Add a different colored stitch marker into the 14th and 19th stitch in Round 7. Later we will replace these eye stitch markers with safety eyes.
Round 8: Sc in the next 8 st. Working in the FLO, Inc in the next st, Sc in the next st 3 times. Working in BOTH loops, Sc in the next 4 st. Working in the FLO, Inc in the next st, Sc in the next st 3 times. Working in BOTH loops, Sc in the next 6 st (36)
Round 9: Dec 1 time, Sc in the next st all around (24)
Round 10: Dec, Sc in the next 2 st all around (18)
Round 11: Working in the FLO, Inc, Sc in the next st all around (27)
Add the eyes into the marked areas now.
Round 12: Inc, Sc in the next 2 st all around (36) Round 13-22: Sc all around (36)
Stuff the head firmly now.
Round 23: Dec, Sc in the next 4 st all around (30) Round 24: Dec, Sc in the next 3 st all around (24)
Stuff the body firmly now. Continue stuffing after each round.
Round 25: Dec, Sc in the next 2 st all around (18) Round 26: Dec, Sc in the next st all around (12) Round 27: Dec all around (6)
Finish off, leaving a long tail for sewing. Sew the remaining stitches together and weave in ends. Cut any excess yarn.
Snout
In Hot Pink
Round 1: Make 9 Dc into a Magic Ring. Tighten the ring to form a circle (9)
Round 2: Working in the BLO (Back Loop Only), Sc all around (9)
Finish off, leaving a long tail for sewing. Pin the snout on as shown and sew on, making sure to add stuffing before fully sewing on. Once done, weave in ends and cut any excess yarn.
Left Ear
In Regular Pink
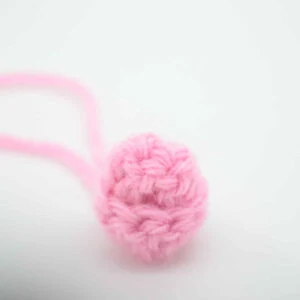
Round 1: 6 Sc into a Magic Ring (6)
Round 2: Inc all around (12)
Round 3: Hdc into the next st, then Dc into that same st. Now we will make the pointy part of the ear. Ch 2. Sc in the 2nd Ch from the hook. Make a Dc in the next st, Hdc into that same st. Skip the next st, SlSt in the next st.
Finish off, leaving a long tail for sewing. Pin this left ear onto the left side of the toy's head as shown and sew or hot glue on. Once done, weave in ends and cut any excess yarn.
Right Ear
In Regular Pink
Round 1: 6 Sc into a Magic Ring (6)
Round 2: Inc all around (12)
Round 3: Skip the next 2 st, SlSt in the next st. Make a Hdc into the next st, then Dc into that same st. Now we will make the pointy part of the ear. Ch 2. Sc in the 2nd Ch from the hook. Dc into the next st, then make a Hdc into that same st. Skip the next st, then SlSt into the next st.
Finish off, leaving a long tail for sewing. Pin this right ear onto the right side of the toy's head as shown and sew or hot glue on. Once done, weave in ends and cut any excess yarn.
Blanket
In Purple (Or any color)
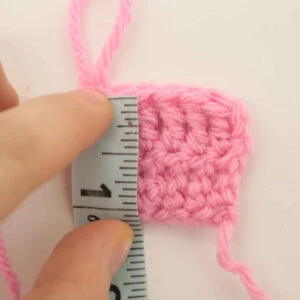
IMPORTANT NOTE: The blanket is made using triple crochet (trc) stitches. It's very important to have a tight, firm tension when you make your Trc stitches for the blanket. If your tension is too loose, your Trc stitches will come out too big, which will make your blanket come out too big. This is especially possible if you're a newer crocheter or if you don't have a tight tension when you crochet.
I highly recommend making a quick test swatch to ensure your tension is correct before crocheting the entire blanket
Test swatch: Row 1: Ch 8. Trc in the 3rd Ch from the hook. Trc in the next 5 st (6)
Row 2: Ch 3 and turn. Trc in the next 6 st (6)
One trc should measure about 0.5″ tall (or about 14mm tall). If your stitch is larger, try a tighter tension until your stitch is 0.5″ tall OR simply use a 3mm hook for the blanket with your regular tension.
If you are confident that you are making your Trc stitches with the correct tension, then continue the pattern as normal with a 4mm hook!
Round 1: Ch 41. Working in the 2nd Ch from the hook, Sc 3 times into that chain. Hdc in the 10 st, Dc in the next 3 st, Trc in the next 12 st, Dc in the next 3 st, Hdc in the next 10 st. Now we're on the corner of the blanket. Hdc 3 times in the next st. Working on the other side of the blanket, Hdc in the next 10 st, Dc in the next 3 st, Trc in the next 12 st, Dc in the next 3 st, Hdc in the next 10 st (82)
Round 2: Make 2 Hdc in each of the next 3 st, Hdc in the next 2 st, Dc in the next 2 st, Trc in the next 30 st, Dc in the next 2 st, Hdc in the next 2 st, make 2 Hdc in each of the next 3 st. Now we're on the other side of the blanket. Hdc in the next 2 st, Dc in the next 2 st, Trc in the next 30 st, Dc in the next 2 st, Hdc in the next 2 st (88)
Round 3: SlSt in the next 8 st, Sc in the next st, Hdc in the next st, Dc in the next st, Trc in the next 30 st, Dc in the next st, Hdc in the next st, Sc in the next st, SlSt in the next 8 st. Now we're on the other side of the blanket. Sc in the next st, Hdc in the next st, Dc in the next st, Trc in the next 5 st, make a Trc Decrease stitch 9 times, Trc in the next 6 st, Dc in the next st, Hdc in the next st, Sc in the next st, SlSt in the next st (79)
SlSt to the next st to complete the blanket. Finish off, leaving a long tail for sewing. Pin the blanket on as shown (the part with the 9 Trc Decreases goes on top of the shoulders of the pig) and sew or hot glue on. Once done, weave in ends and cut any excess yarn.
Hands (Make 2)
In Regular Pink
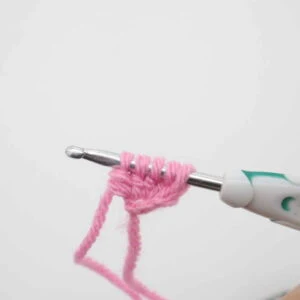
The hands are made by creating a single popcorn stitch. We essentially create 4 half-done half double crochets, then yarn over to crochet the half double crochets together.
Row 1: Ch 2 (Pic 1). Yarn over and insert your hook into the 2nd Ch from the hook. Yarn over and pull up a loop. You will have 3 loops on your hook (Pic 2). Yarn over and pull through two loops (Pic 3).
Repeat what is in the stars a total of three times: Yarn over and insert your hook into the same stitch we were just working in. Yarn over and pull up a loop. Yarn over and pull through two loops.
After doing this, you will have 5 loops on your hook (Pic 4). Yarn over and pull through all 5 loops at the same time (Pic 5-6). This will form the hand.
Finish off, leaving a long tail for sewing. You can pull the tail ends of yarn to tighten up the hand if needed. Then, pin the hands on as shown (Pic 8) and sew or hot glue on. Once done, weave in ends and cut any excess yarn.
Left Foot
Start in very light pink
Round 1: Make 8 Hdc into a Magic Ring. Tighten the ring to form a circle (8)
Round 2: Change to pink. Working in the BLO, Sc in the next 4 st. Now we will form the hoof of the foot. Insert your hook into the middle of the magic ring as shown (Pic 1-2) and Sc 1 (Pic 2-4). Continuing to work in the BLO, Sc in the next 4 st (Pic 5) (Stitch count: 9. The stitch count goes up by 1 because we added the Sc into the Magic Ring)
Round 3: Working in BOTH loops, Sc all around (9)
Now we will form the side of the leg.
Row 4: Sc in the next st. Ch 1 and turn. Sc in the next 4 st (4)
Row 5: Ch 1 and turn. Dec 2 times (2)
Finish off, leaving a long tail for sewing. Pin the left foot onto the left side of the toy's body as shown and sew on, making sure to add stuffing before fully sewn on. Once done, weave in ends and cut any excess yarn.
Right Foot
Start in very light pink
Round 1: Make 8 Hdc into a Magic Ring. Tighten the ring to form a circle (8)
Round 2: Change to pink. Working in the BLO, Sc in the next 4 st. Now we will form the hoof of the foot. Insert your hook into the middle of the magic ring as shown (Pic 1-2) and Sc 1 (Pic 2-4). Continuing to work in the BLO, Sc in the next 4 st (Pic 5) (Stitch count: 9. The stitch count goes up by 1 because we added the Sc into the Magic Ring)
Round 3: Working in BOTH loops, Sc all around (9)
Now we will form the side of the leg.
Row 4: SlSt in the next st. Sc in the next 4 st
Row 5: Ch 1 and turn. Dec 2 times (4)
Finish off, leaving a long tail for sewing. Pin the right foot onto the right side of the toy's body as shown and sew on, making sure to add stuffing before fully sewn on. Once done, weave in ends and cut any excess yarn.
Tail
In Regular Pink
Row 1: Ch 7. Make 3 Dc into the 2nd Ch from the hook. Make 3 Dc in each of next 5 st (18)
Finish off, leaving a long tail for sewing. Hold one end of the crochet piece, then twist the other end of the crochet piece until the tail until it forms a swirl (Pic 2). The double crochets will naturally want to twirl, just use your fingers to guide the twirl. Then, pin the tail on as shown and sew or hot glue on (Pic 4). Once done, weave in ends and cut any excess yarn.
Finishing Your Pig in a Blanket Amigurumi
Done! Your adorable pig in a blanket amigurumi is now complete! This 5-inch toy makes a perfect desk companion or gift for children and adults alike.
The contrasting pink body and customizable blanket create a charming character that's both huggable and decorative. The curled tail and pointy ears add personality, while the blanket gives this amigurumi its signature cozy look.
Share Your Creation!
If you made this pig in a blanket amigurumi, I would LOVE to see! You can show me by posting a picture in the comments underneath this post. Use hashtag #PigInABlanketAmigurumi when sharing on social media so I can admire your work!
Try making this amigurumi with different blanket colors to match your décor or the recipient's favorite color. Each variation creates a new personality for your pig friend!


.png)

.png)


.jpg)


.png)
.jpg)
.jpg)
.jpg)
.jpg)

.png)


.png)


